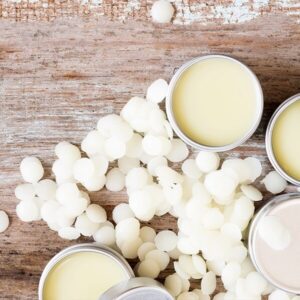
Beeswax is one of the most basic raw materials for homemade lip balm. Because beeswax is a substance secreted by bees and specially used to build honeycombs, it has natural antibacterial properties, so it is not easy to deteriorate. In skincare products, beeswax is often used to increase hardness and moisturizing effect. It is a pure natural moisturizer. This ingredient has been used in cosmetics for two thousand years. It can form a protective film on the skin surface to prevent the skin from being affected by the external environment.
Beeswax olive oil lip balm can quickly moisturize the lips, replenish the nutrients needed by the lips, and lasting moisturizing. Beeswax olive oil lip balm can better moisturize the lips and repair damaged lips. You can also add 3 drops of rose to it. Essential oils greatly enhance the moisturizing degree of lipstick.
6 STEPS TO MAKE NATURAL LIP BALM AT HOME
Below we will introduce the easiest way to make natural lip balms at home.
Before this, we would like to introduce you The ratio of beeswax to olive oil is 1:4. You can add or subtract according to the number of lipsticks made. For example, to make seven tubes of lipstick, beeswax is 7g and olive oil is 28g.
If you want the lipstick to be harder, put more beeswax, and if want softer, put less beeswax. More or less as you like, but the ” tolerance” should not be too large, otherwise either too hard to use, or too soft to make a cream. The normal ratio is that the ratio of beeswax to oil is 1:4, and the hardness is just all right.
Step 1: Disinfection. Using 75% medical alcohol to soak the empty lip balm tube or tins, measuring cup, and stirring bars for about half an hour, then air-dry naturally.
Step 2: Melting wax.Cut the beeswax into small pieces and put it into a measuring cup, slowly heat and stir it over a small fire over water. The melting point of the wax is about 60-70 degrees, and the water temperature should not be too high.
Step 3: Melting oil. Pour olive oil and stir well to mix with beeswax.
Step 4: Trial drop.Take a little mixture from the cup and place a drop on the table. After cooling, feel the softness and hardness to the touch. If it is too soft, add wax, and if it is too hard, add oil until you are satisfied.
Step 5: Add vitamin E or essential oil. Wait for the temperature of the mixture to decrease slightly before adding vitamin E or essential oil. (Depending on your favorite, not essential)
Step 6: Irrigation tube or tin. Depending on the size of the empty tubes or tins, it is generally possible to irrigate many branch tubes or tins at one time.
flytinbottle
Metal containers are ideal for home, office, and business use. Whether you want a tin that’s designed for long-term storage, organization, retail displays, or special occasions, you can rely on the durability and versatility of our tin containers. In today’s world, tin boxes are one of the most popular packaging used thanks to the fact that they are affordable, durable, and sustainable.

