Do you want to give your product picture a perfect stand-out look? If the answer is yes, removing a whole background from an image is what you need.
Well, the good news, there are several background removal services that can turn any picture turned into a flawless one. One of the most effective ways to remove the entire background from a picture is the Photoshop Pen Tool.
In the following article, we will discuss about the steps to follow for this useful tool. So you can get started with your work right away.
But, before jumping straight to the details, let’s first develop a basic understanding of this tool:
What is the Pen Tool?
A pen tool is a standard tool that is used in Photoshop to create paths and shapes of varied shapes to make selections. Plus, you can use them to make and manipulate the selections later on.
It is one of the most accurate and effective methods to remove an entire background from an image in Photoshop. Why?
Well, it is because you get the most control over the outcome. As it gives one full control, so for most people, it can seem a bit time-consuming, requiring a bit of patience to do the work with perfection.
This tool is the best to use when the subject and the background are not highly contrasted. And lets you to draw around an area using a great combo of straight lines and flexing curves. Besides, you can even toggle between the two by mousing over a node and pressing the Control/CTRL button.
How Do I Remove a Whole Background From An Image Using the Pen Tool in Photoshop? [8 Easy Steps]
Removing the background from a picture using the pen tool is pretty easy. Just follow the steps as instructed in the below section:
Step 1: Open the Image
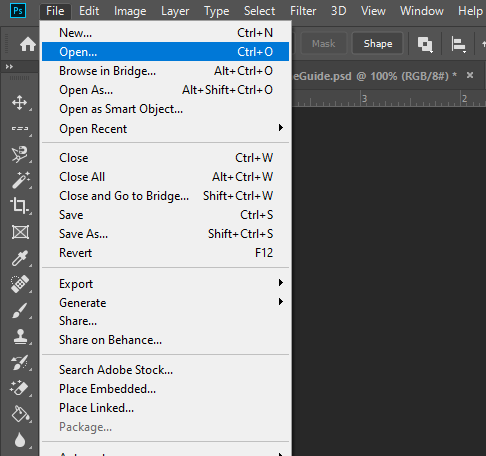
Open the picture you want to remove the background in Photoshop. In case you don’t know, follow as accordingly:
Click on File -> Open. Browse your PC, choose the picture, and click on Open. That’s it; all ready to get to work!
Step 2: Choose the Pen Tool
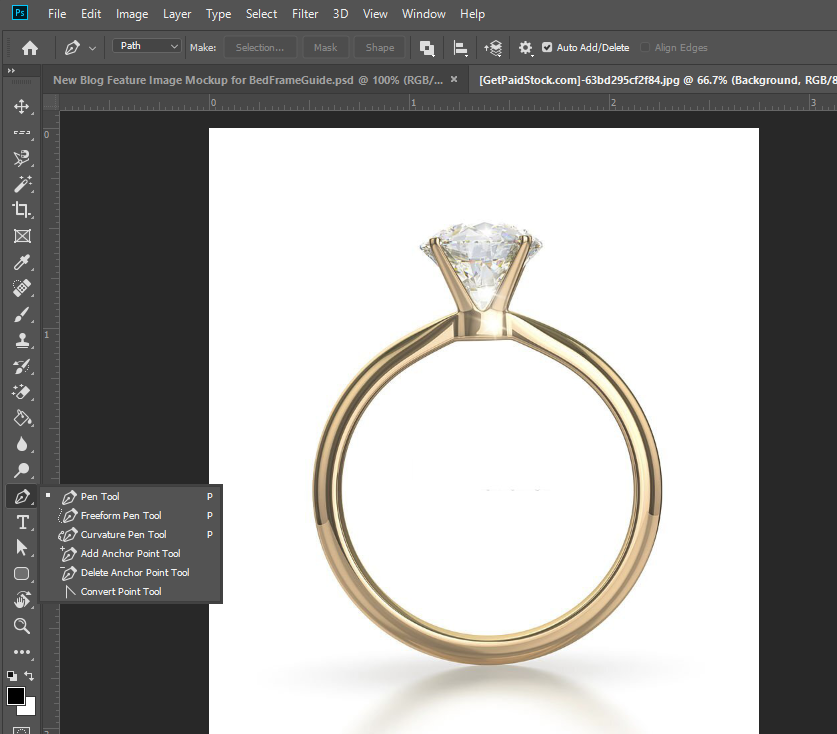
In the second step, select the pen tool from the toolbox, available on the left-hand side above the Text tool. It is pretty easy to spot. You can simply click on it or use the keyboard shortcut “P.”
Step 3: Drawing the Path
Zoom in to the portion of the picture you want to keep. The ideal is to start with the edge of the subject and then proceed with the further steps. Next up, start adding the anchor points.
Continue adding additional anchors to begin outlining the subject. If you make any mistake while adding the points, don’t worry, as you can remove them, whenever needed.
In case you require to make a curved line, just click, hold and drag the mouse as per your requirement to adjust the curve.
You can use the Direct Selection tool in the toolbox to adjust an anchor point or directional lines for fine-tuning. It usually remains hidden underneath the Path Selection tool.
To undo an anchor, go to File > Undo. Or, you can just use the keyboard shortcut as follows:
- Windows: Control + Z
- macOS: Command + Z
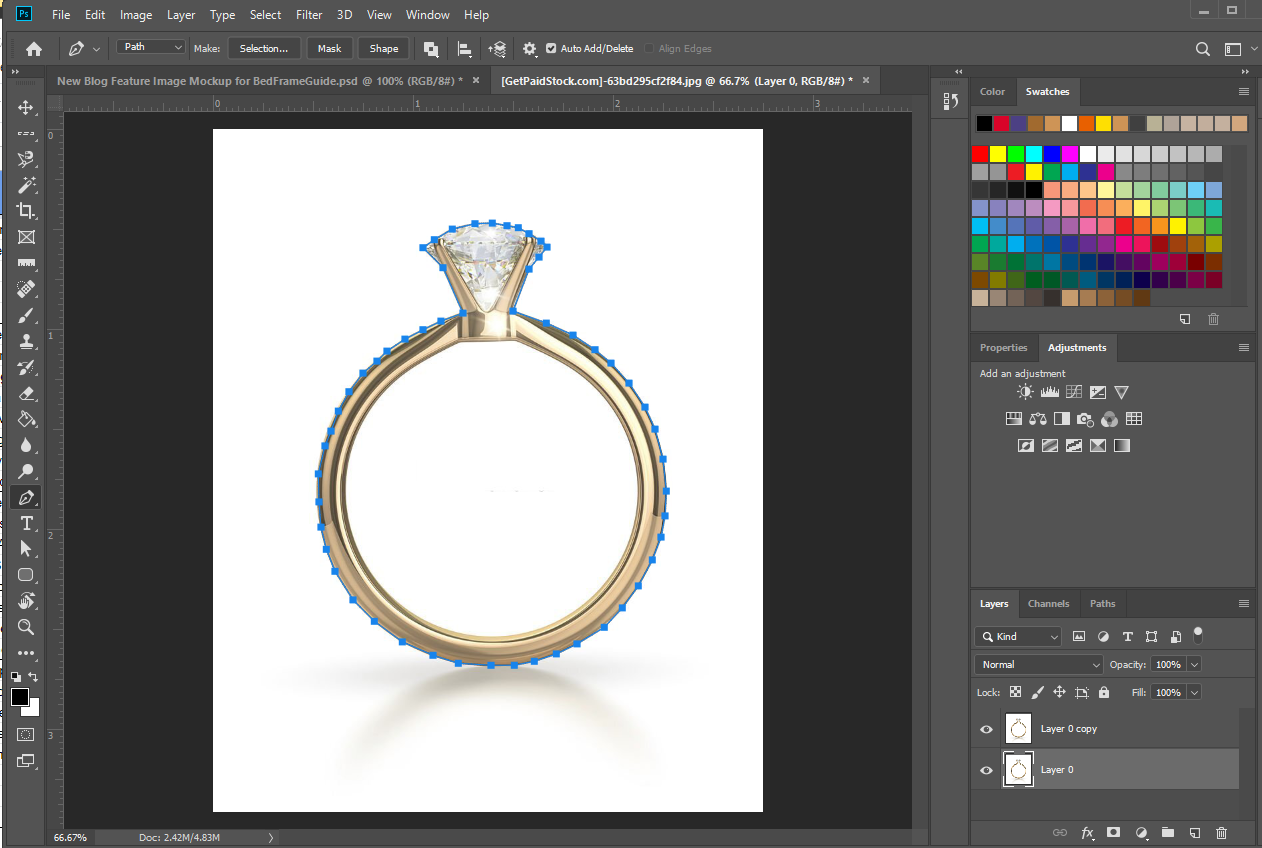
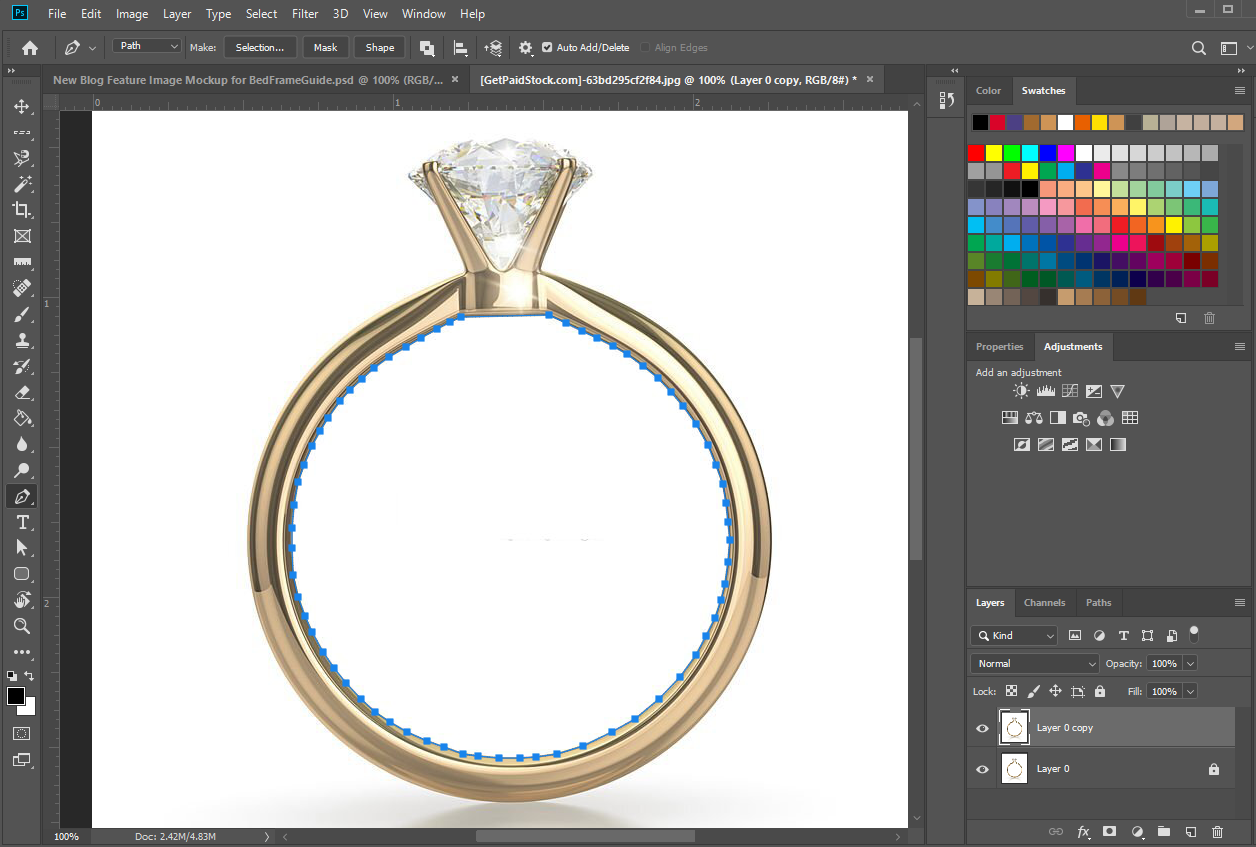
If your picture has close boundaries, you may have to add another path to eliminate the background from the inside, as shown below:
Step 4: Save the Path
Once you are done, make sure to complete the route by returning back to the initial point. If you are happy with the outcome, you can finally save it.
Go to Window > Paths to see the paths panel. It must appear on the right-hand side by default.
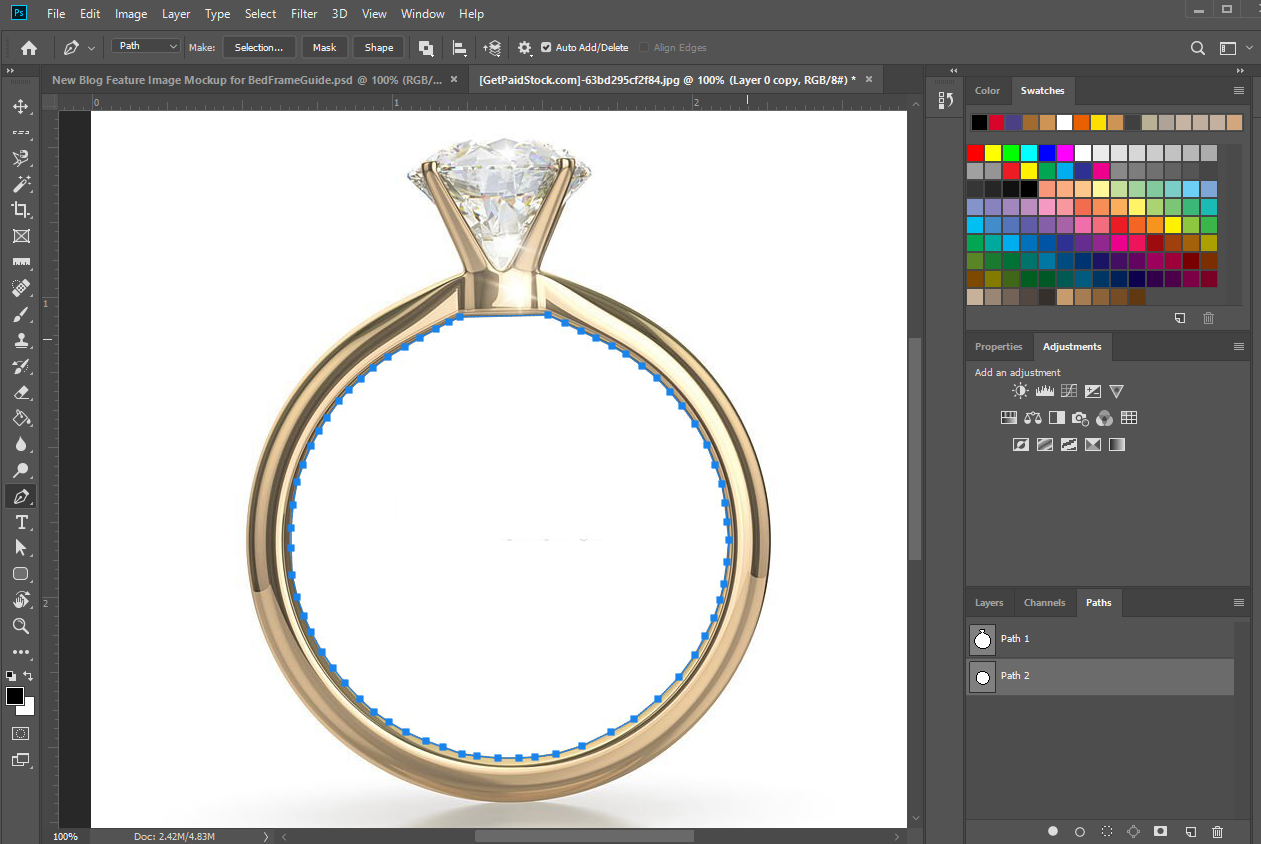
Step 5: Choosing Make Selection
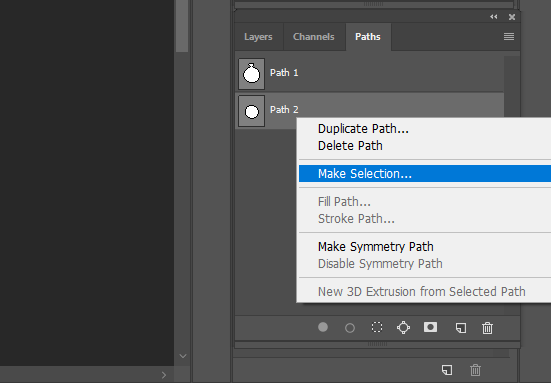
In this step, your job is to right-click on the new path of the paths panel (as created in the 3rd step), and click on the option, stating “Make Selection.”
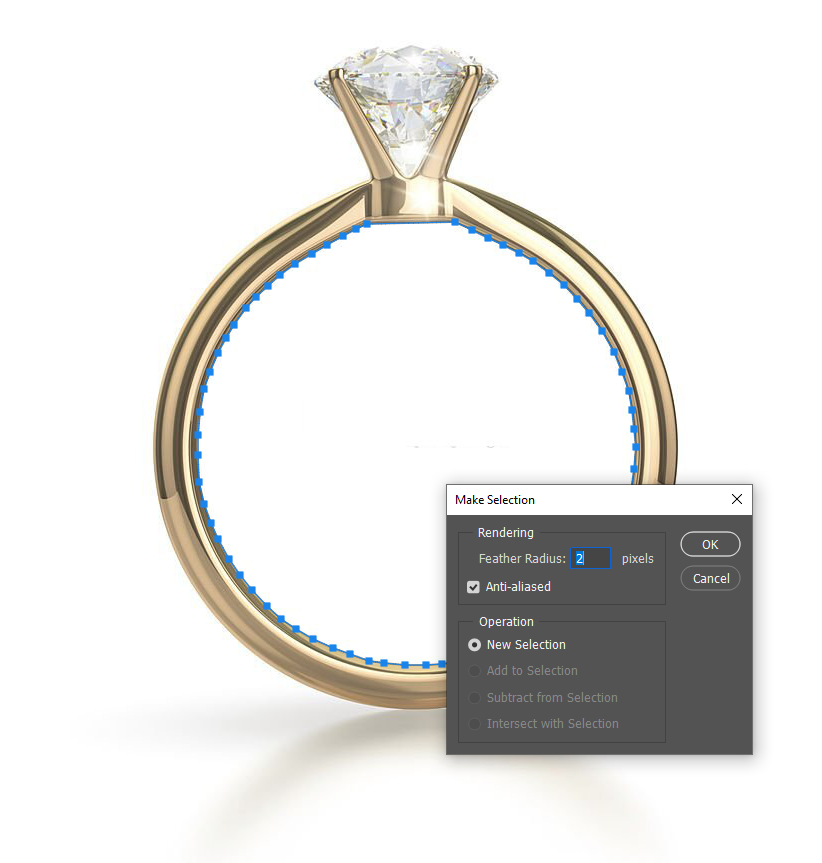
Moving on, you will find a message box, asking for the Feather value (used for softening the picture sides). You can pick any suitable value, like 10 (choose as per your requirement), and then click Ok.
Step 6: Adjusting the Selection
We should adjust the selection to include everything but the subject. After all, we don’t want to erase what is already there. Right!
So, go to Select > Inverse.
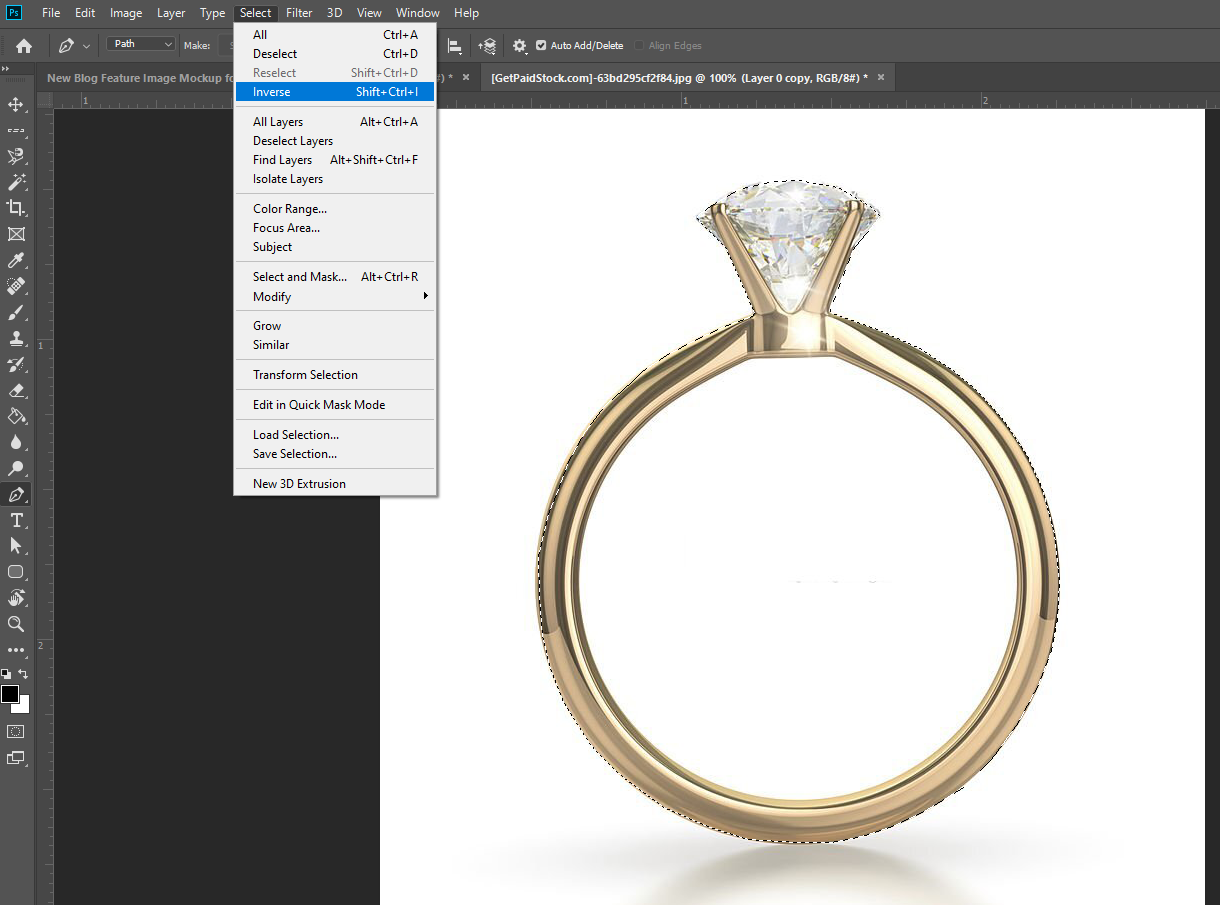
As you can see, the marching ants will now have surrounded the whole picture, including the subject, and virtually choosing the background.
Step 7: Duplicate the Background Layer
Once the conversion is done, your next step ahead is duplicating the background layer.
Simply click on the background layer and then look for the option “Duplicate Layer.” Click on it.
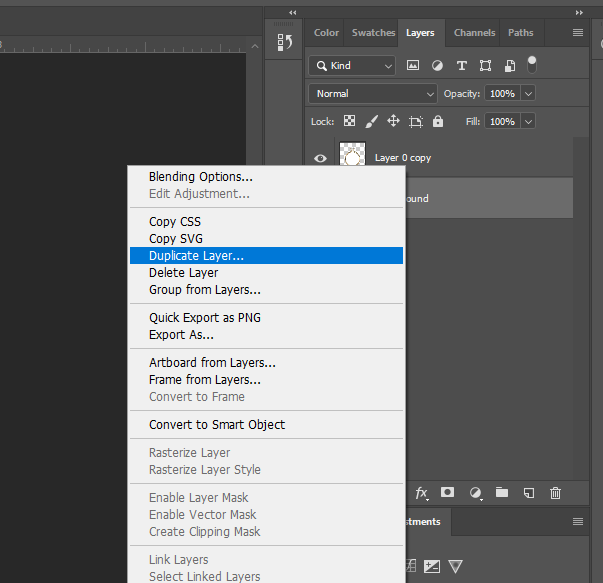
Turn off the original visibility, as shown below in the picture.
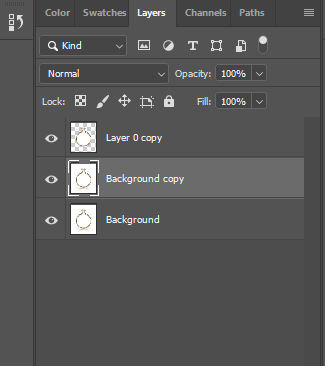
Step 8: Delete the Background
This is the last step. Simply press the Delete button on your keyboard to remove the background once and for all.
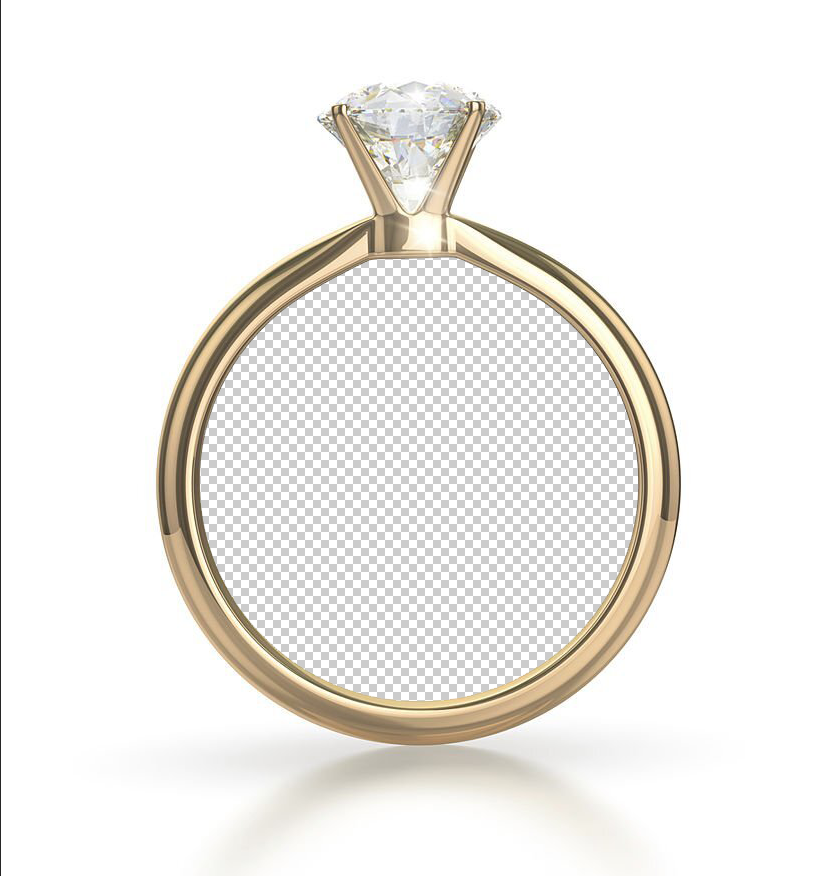
Repeat the same method for the other paths.
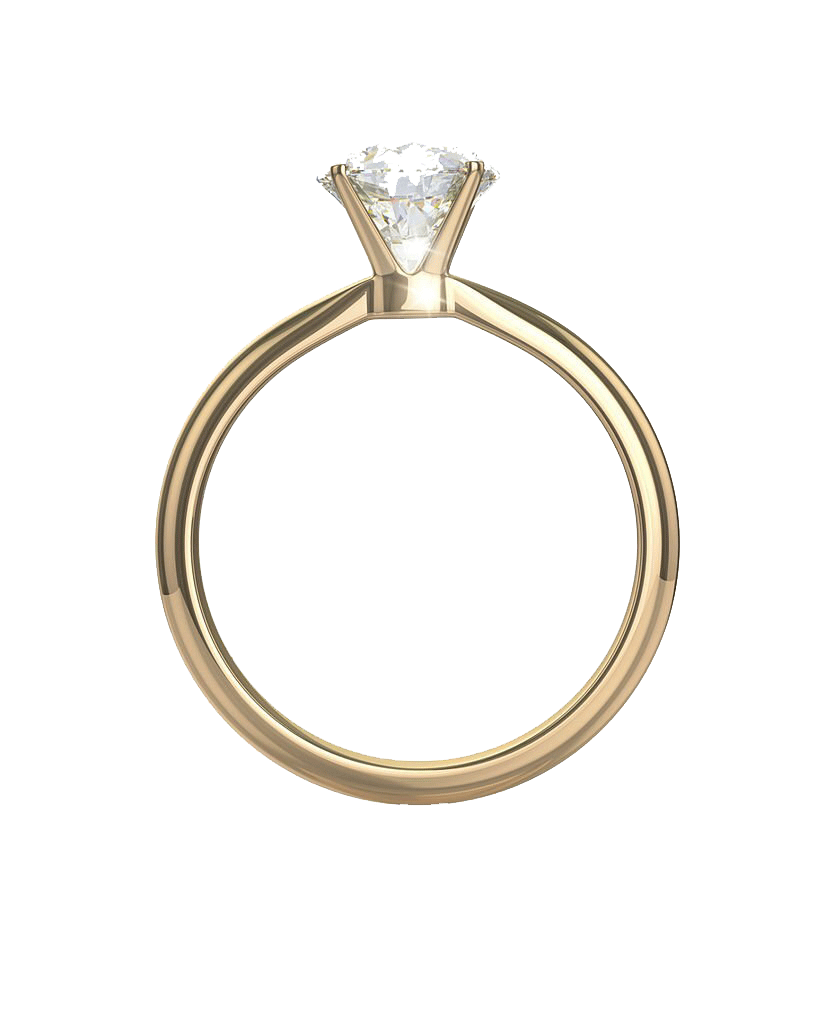
Upon successful command of the process, you should now see a white background rather than the old background.
To Wrap Up
If you are searching for an easy and effective method to pull off the entire background from a picture, the above steps are what you need to follow. They will help you achieve the targeted result in the most classy way!
So, what are you waiting for? Go, give it a try!

