In this blog, we will guide you step by step on how to set up a KVM switch. If you have multiple computers but only one monitor, keyboard, and mouse, setting up a KVM (Keyboard, Video, Mouse) switch can save you a lot of hassle. A KVM switch allows you to use one set of peripherals to control multiple computers, making it easier to switch between them without having to unplug and plug in cables.
Step 1: Choose the right KVM switch
Before you start setting up the KVM switch, you need to choose the right one for your needs. There are different types of KVM switches available on the market, so make sure you choose one that is compatible with your computer’s ports and operating system. Additionally, you need to consider the number of computers you want to connect, the distance between them, and the type of peripherals you have.

More information: Buying guide — KVM switch key concerns
Step 2: Prepare the cables, adapters, and hubs if you need
Once you have chosen the right KVM switch, it’s time to gather the necessary equipment. Basically, you shall already have the computing devices, monitors, and USB peripherals in mind that you wanna integrate into one setup. If the connector types of them are incompatible with the KVM switch you have chosen, you may need adapters or a docking station to help.
Another thing is that not all KVM switches come with, for example, HDMI cables, and you need to buy a few of them that meet your setup’s standards. If you are using an HDMI 1.4 cable for your HDMI 2.0 devices, you are bringing down the image quality.
Read this to avoid using an adapter in the wrong way.
Step 3: Connect to your computing devices
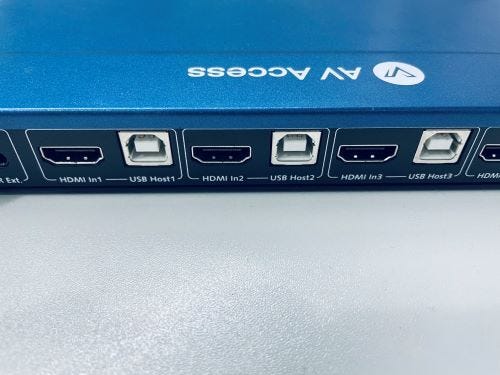
For each laptop, PC, or game console in the setup, you shall connect both their video out and USB port to the KVM switch. For each system, the ports are grouped and numbered. Put each cable in the right group so that the USB control and video output will match.

Step 4: Connect to your USB peripherals
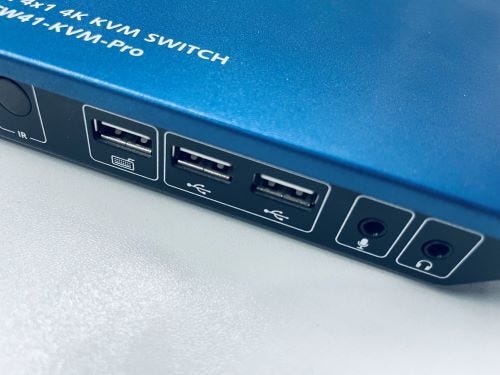
If you are using a hotkey to switch between devices, connect your keyboard to USB 1.1 or the USB port that is marked as for a keyboard connection. If you are using a high-power USB device such as a 4K webcam, connect it to a USB 3.0 if there is any. Using the USB port with a higher Volt would help as well.

Step 5: Power up the KVM switch
After you have connected everything, it’s time to power up the KVM switch. Connect the power cable to the KVM switch and plug it into a power outlet. Once the KVM switch is powered on, you should see the power indicator light up.
Step 6: Test the KVM switch
Finally, test the KVM switch to make sure everything is working correctly. Use the KVM switch to switch between the connected computers and make sure the monitor, keyboard, and mouse are responding as expected.
If you are new to this gadget, you shall read this article (Why Isn’t My KVM Switch Working?) and find out if your KVM switch is right before it’s too late.
Conclusions
In conclusion, setting up a KVM switch is a straightforward process that can save you a lot of time and hassle. Basic KVM switches are well-designed for plug-and-play quick use. However, sometimes you do need time to find out what you need in practical use. As you are reading this, you shall have skipped some trials and errors along the process. Good luck!
Here are more resources you may be interested in:

