Cricut Maker is among the most popular DIY cutting machine in the current market. This machine is fast, robust, powerful, and cut with utmost precision. Loads of advanced features of the machine give unbelievable results that any other machine can. One of its prominent features is Calibration which ensures pinpoint cuts for your projects. If you also want to cut your projects more accurately, then it is beneficial to know how to calibrate the Cricut maker. Hence, keep reading this write-up to get vital pieces of information on calibration.
What is Calibration in Cricut machines?
Calibration is a procedure that allows Cricut machines to cut projects with more accuracy without making any mistakes. With the help of the calibration, your Cricut machines can recognize the housing of the Knife Blade Drive. As a result, crafters get pinpoint cuts while working on their projects. Apart from the calibration is also important if you want your machine to cut projects properly while doing Print and Cut. So, it is important for every crafter to know how to calibrate the Cricut maker.
How to Calibrate Using the Cricut Maker Machine?
Though the Cricut Maker machines come with a pre-calibration setting for the cutting, however, there can be some situations where the crafters have to calibrate the machine. So, follow the below procedure to calibrate your Cricut Maker machine manually.
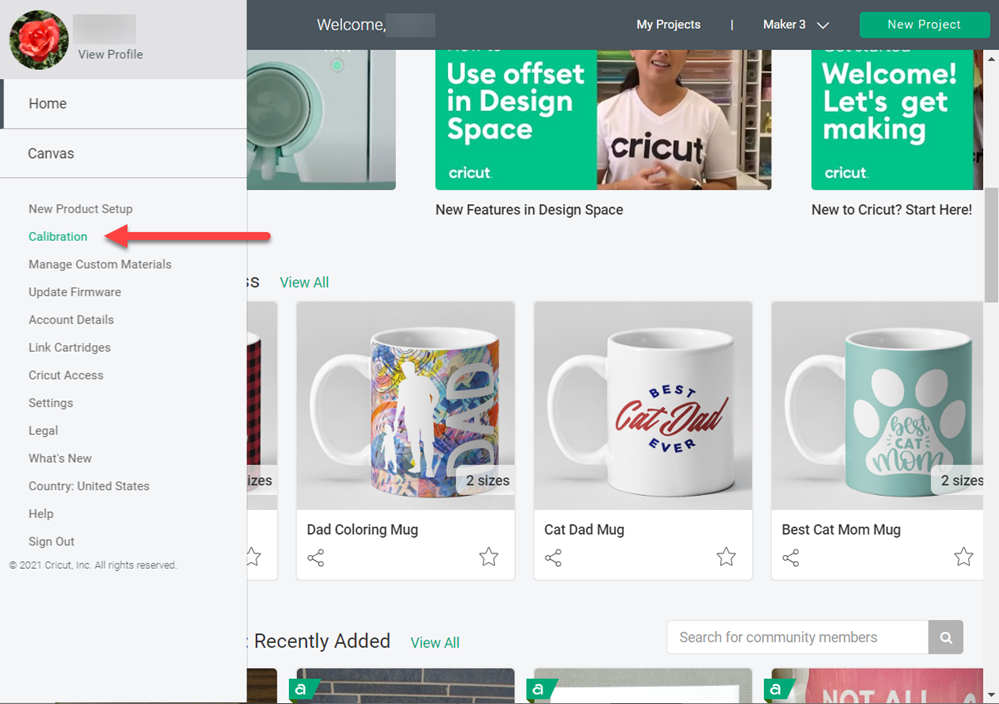
- First of all, open the Cricut Design Space app and click on click on the Menu (≡) option in the upper right corner.
- After that, from the list, choose Calibration.
- After that, click on the Rotatory blade option.
- In the next step, you need to fix the blade in the machine and then load the printer paper on the mat.
- And then click on the Continue option.
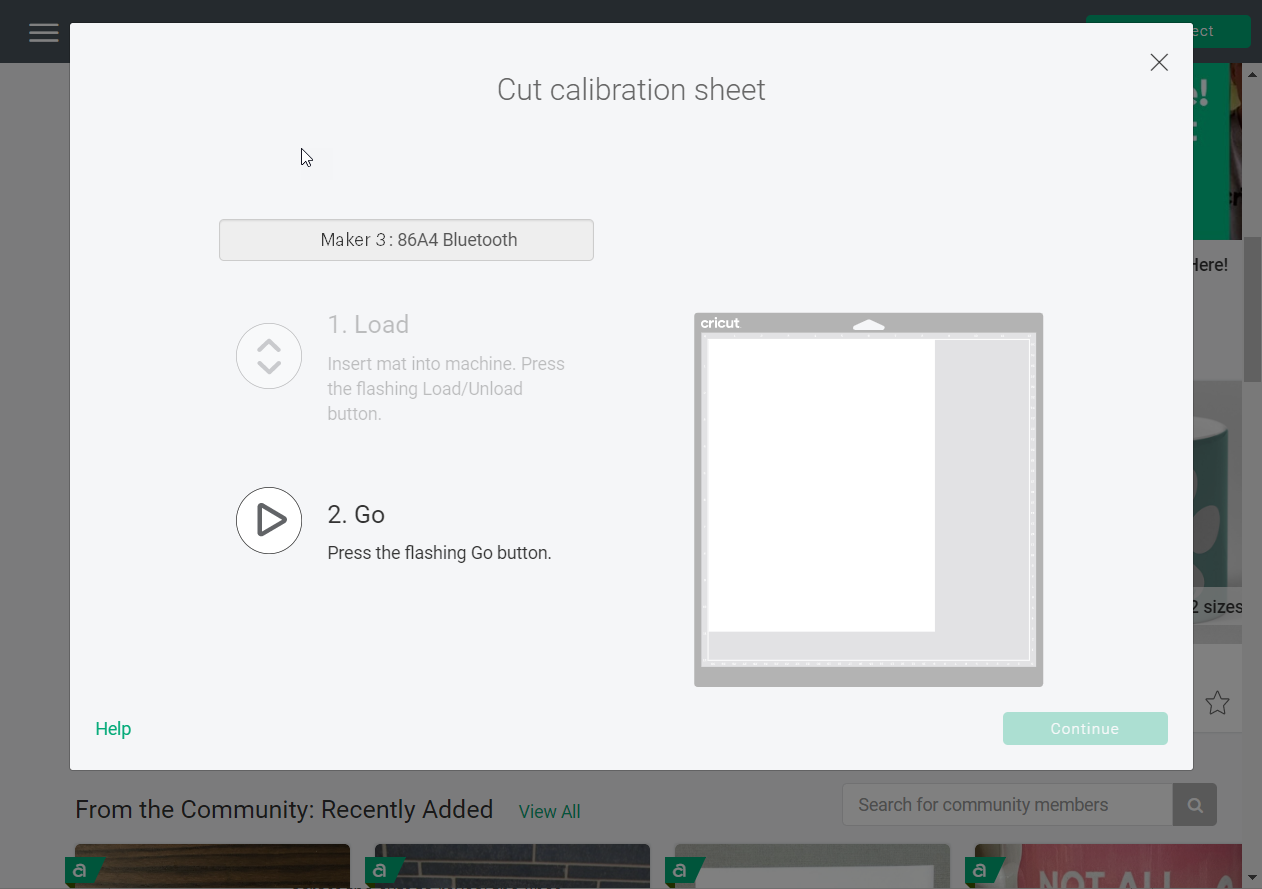
- Afterward, open the drop-down menu and choose the Cricut machine you are using.
- Then, you are required to load the paper and the mat in the machine.
- After loading the mat into your Cricut machine, click on the Go option.
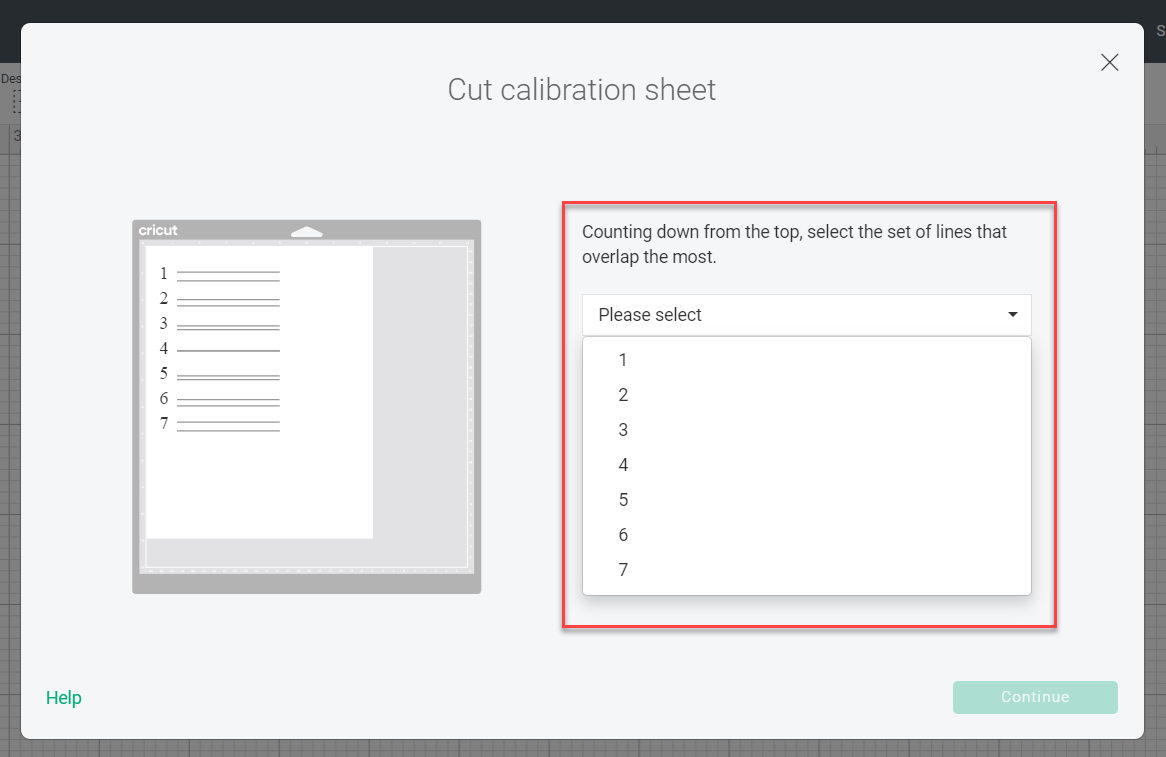
- Once you choose the Go option, the machine will make 7 sets of lines of paper. After the cut is complete, remove the mat from the machine.
- Next, you can use the highlighter if you have difficulty seeing the cut lines.
- Furthermore, you have to check the cut lines carefully can find the lines that are overlapping.
- And then, you are required to choose the number of overlapping lines from the drop-down menu.
- After making the selection, click on the Continue option.
- Now the machine calibration is complete. You can result to making your design and finish the project.
How to Calibrate Your Machine for Print Then Cut?
Here is the step-by-step guide to calibrating the Cricut machine for Print Then Cut.
- Open the Cricut Design Space app and sign in with your Cricut account.
- Next, go and select the Menu (≡) option.
- From the open options, click on Calibration.
- After that, click on “Print Then Cut.”
- Now, you need to choose the printer option and click on the Print option.
- And then, take the printed calibration sheet and place it onto the machine mat. Also, make sure to position the mat upper left corner of the mat.
- Then, click on the Continue option.
- Moreover, go to the Cricut machine and check if it is ON. Also, ensure that it is connected to your computer system by Bluetooth pairing or via USB cable.
- When you are on the next screen, you must click on the machine and the materials you use.
- After that, load the mat into the machine and click on the flashing Go button on the screen.
- Then the Cricut machine will start to scan the sheet to make calibration markings.
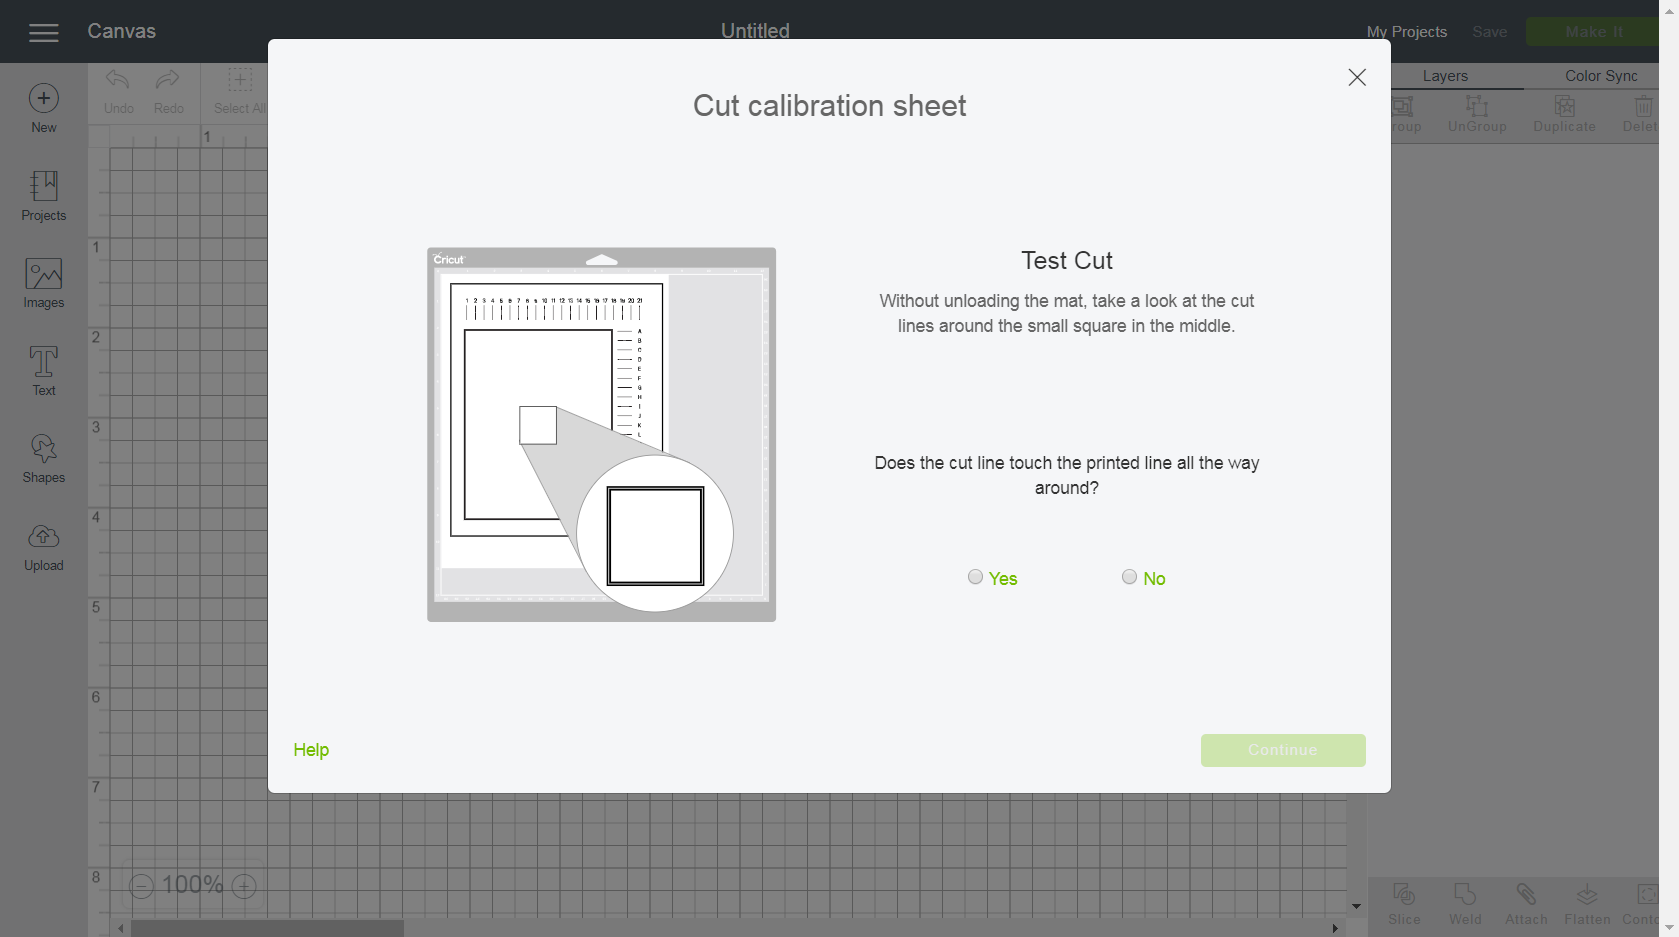
- After that, it will cut the small square in the center of the sheet.
- Next, you have to inspect the cut without unloading the mat if the cuts are touching the printed lines. If it touches the lines, then click on the Yes option in the design space.
- Afterward, move to the next step.
- Then, the machine will start the cutting procedure of calibration on the top and the side of the sheet. When the cut is complete, check if the cut is right without unloading the mat.
(Note– On the page, some cuts will touch the lines, and others will not. You need to click on the Top and then the Right drop-down menu to fix the line numbers or letters with cuts that are closest to cut.)
- Moreover, click on the Continue option.
- Now, the machine will cut the big rectangle of the sheet to perform the confirmed cut.
- For the next process, unload the mat and remove the calibration sheet. Also, you have to respond to the last question in the Design Space app.
- If the cut is right, then choose the Yes option and then head to the final calibration sheet.
- If you choose the No option, then you will be guided to the calibration process once again.
- Click on the Save & Close option to save the calibration settings.
- Lastly, your Cricut Maker machine will be ready to perform Print Then Cut.
Frequently Asked Questions (FAQs)
Do I need to recalibrate my Cricut?
You can perform the calibration of your Cricut machine, such as Cricut Maker. However, if you are not satisfied with the calibration after performing once, then you can run the recalibration. Also, keep in mind that most of the Cricut devices come with pre-calibration settings.
Is Cricut maker more precise?
Yes, Cricut Maker is considered the finest cutting device for DIY projects. It can be the projects with amazing precision and accuracy. Also, it comes with a calibration feature that can enhance the cutting quality of the projects.
Why is my Cricut not cutting accurately?
Sometimes your Cricut machines can have some issues in cutting materials, and cuts are not aligned. Some of the primary reasons could be issues with the blade or blade housing. Also, if there is any debris in the blade, then you can see some issues while cutting your projects.


